
Back
Help Topics Menu
How do I set up and print my own labels?
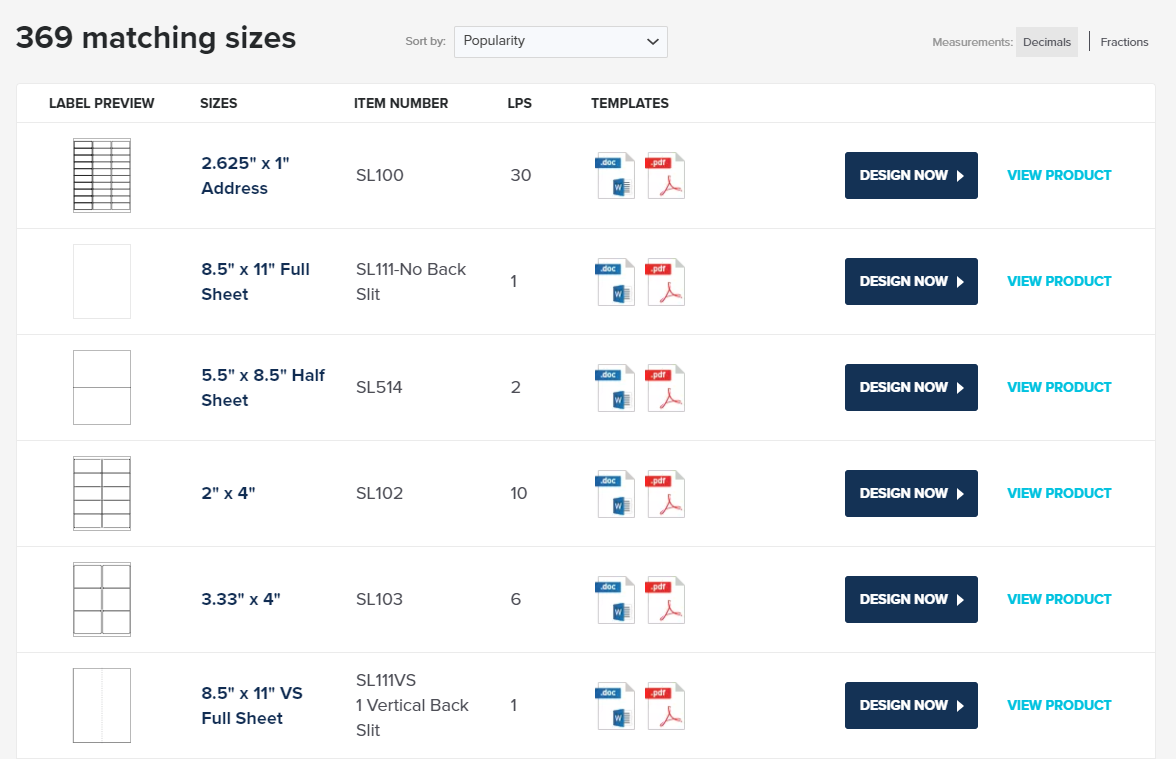
Step 1: Find Your Printing Template
To print your custom labels at home, you'll first need to determine which SheetLabels.com blank label template you're using. You can find this information on your package of labels or on your SheetLabels.com account by checking your order history. It will begin with the letters "SL." If you can't find your template number, you can browse our templates by shape, size, or labels per sheet to find the one that matches yours.
Step 2: Choose Your Template
Once you've found your template, you'll need to download your preferred template format- Adobe PDF or Microsoft Word- or use our online design tool. If you’re using PDF or Word, click to download the blank template to your device. To use our online design tool instead, click “Design Now.”
Step 3: Design and Format Your Labels
From there, you'll be able to open the template in your chosen program and design your labels accordingly. No matter what program you’re using, you’ll want to ensure that you’re optimizing your design for the best possible print. Consider factors such as bleed and your template’s safe zone when designing your artwork. We recommend keeping all important elements such as text, images, and icons at least 0.125” in from the outer edge of each label to ensure nothing is cut off during printing.
Microsoft Word
If you’re using Microsoft Word, we recommend turning on the document gridlines if they’re not already on. This will give you a more accurate idea of how your template is set up.
Adobe
If you’re using an Adobe program, such as Adobe Illustrator, we recommend designing your artwork on a separate layer beneath the existing template guidelines. However, be sure to turn off the guideline layer before printing. Leaving it on will cause the guidelines to print on your final labels.
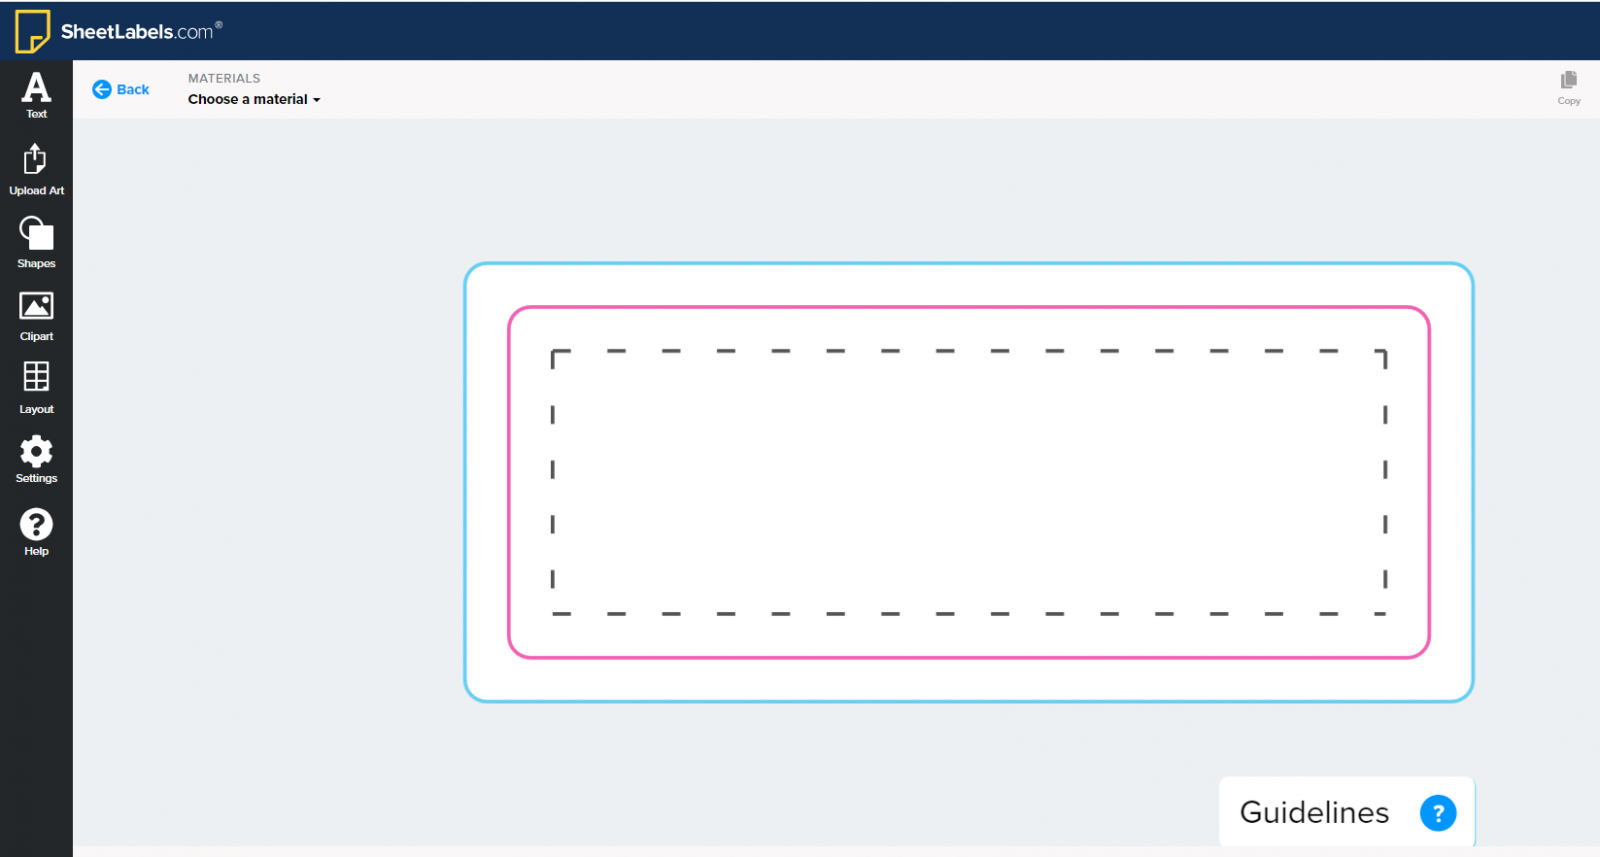
Online Design Tool
If you’re using our online design tool, you’ll have the ability to toggle the template guidelines on and off. We recommend keeping everything within the safe zone (the black dotted line) to ensure nothing is cut off during the printing process. If your chosen template allows bleed, be sure to extend any background colors, images, or patterns to the outer blue line on the template. This will allow your artwork to print to the edge of your label.
If you’ve already created your artwork in the design tool and saved it to your account, you can find your existing design under the “Saved Designs” tab on the user menu. See our tutorial on how to access your saved designs.
Printing Multiple Designs on a Sheet
If you’re looking to print more than one design on a sheet, you’ll need to do this using one of our Microsoft Word or PDF templates. We currently do not offer this option using our online design tool.
Step 4: Print Your Labels
Once you’ve finished designing and formatting your labels, it’s time to print! Carefully load your blank labels into your printer, ensuring that the paper is facing the correct way, and print! See our full list of printing tips.
Loading the Paper
The direction you load your paper in will depend on the printer model you’re using. Some models require you to load the paper with the labels side facing up, while other printers flip the paper, meaning you’ll need to load the paper with the blank, back side facing up. We recommend making a test print to check which way to load the paper if you’re unsure. Consult your printer’s user manual or the printer manufacturer for more information.
Printer Settings
In your printer settings, we recommend setting your Paper or Media Type to “Labels” or a similar setting such as “Heavyweight Paper” for the best possible print.
Microsoft Word or Adobe
If you’re using Microsoft Word or Adobe software, you can simply print directly from the program as you would a regular document. Double check the printer dialogue box to ensure that your artwork will print at the correct size. Depending on the program you’re using, you’ll want to select the “Do Not Scale” option or set your scale to 100% or “Actual Size” before printing.
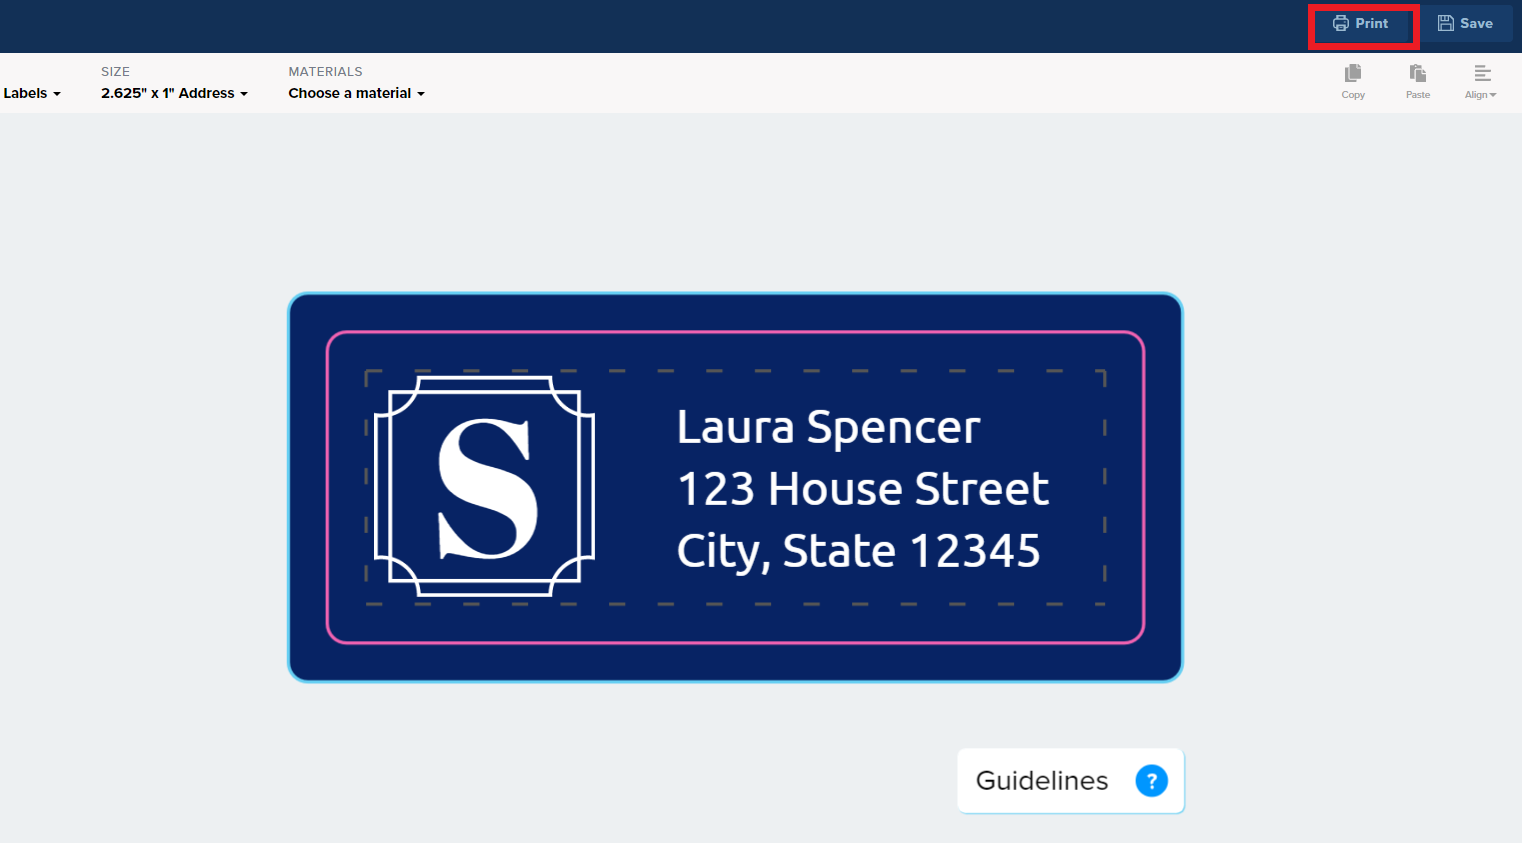
Online Design Tool
Once you're finished with the designing process, click the "Print" button in the upper right-hand corner of the screen. To print at home, choose "Print From Home" to render a downloadable PDF of your label sheet.
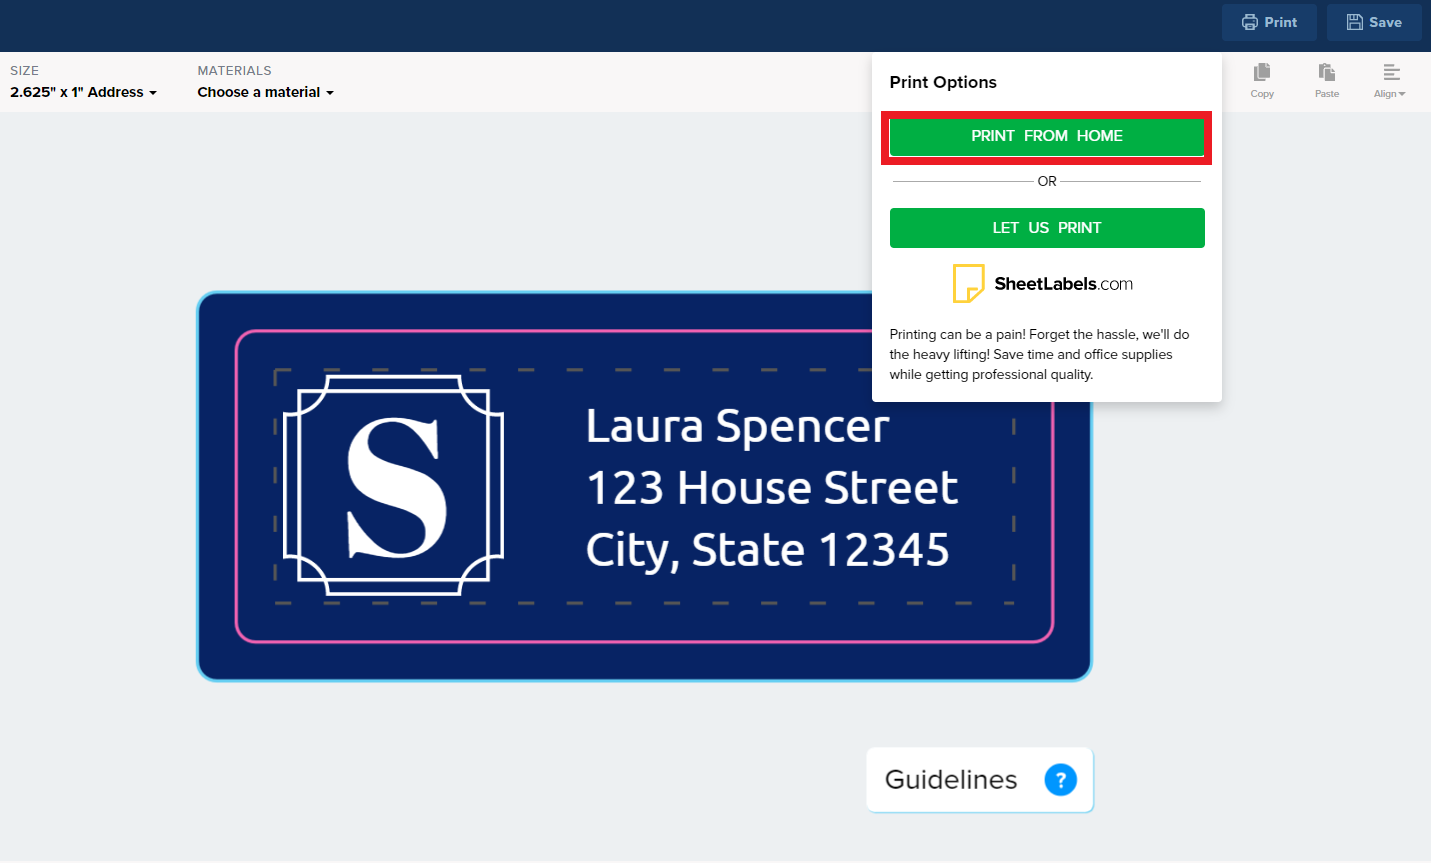
Simply download your formatted sheet, open the file, and print! Be sure to double check the printer dialogue box to ensure that your artwork will print at the correct size. Depending on the program you’re using, you’ll want to select the “Do Not Scale” option or set your scale to 100% or “Actual Size.”
Help and Troubleshooting
If you are having template alignment issues, checkout these troubleshooting steps. For more individualized assistance, our Client Services Team would be happy to help! Contact us today.
Was this helpful?
Need help? We’re here!
Our expert customer service team is ready to help you with any questions or concerns you may have.Real time help is available Monday through Friday 9AM - 6PM EST
- (888) 391-7165
- Chat live with support
- support@sheetlabels.com
Need help? We’re here!
Our expert customer service team is ready to help you with any questions or concerns you may have. Real time help is available Monday through Friday 9AM - 6PM EST- (888) 391-7165
- Chat live with support
- support@sheetlabels.com
Contact
- Contact
- Blank Labels
- Printed Labels
- Helpful Resources
- Company
- Accepted Payments


- Stay in touch
-


© 2026 SheetLabels.com. All rights reserved.
24 Native Drive, Queensbury, NY 12804
